Foolproof Tricks for Achieving a Perfect Gallery Wall Placement Every Time
A gallery wall is one of the most stylish ways to breathe life into your interiors, transforming blank spaces into captivating focal points. Whether it’s an eclectic photo wall in your hallway, a striking photo gallery wall above your sofa, or a carefully curated collection in your stairwell, the secret lies in getting the placement just right. And while creating that Pinterest-perfect look might seem daunting, interior experts (including the ever-brilliant Kelly Hoppen) assure us it’s easier than you think. Here are the foolproof tricks to ensure your gallery wall frames are styled to perfection — no unnecessary wall damage, no stress.
1. Lay It Out on the Floor First
Before you even think about hammering in nails, start with a practice layout. Take all your chosen frames—from family photos to modern art prints—and arrange them on the floor to mimic your wall dimensions.
Interior design guru Kelly Hoppen swears by this trick, explaining, “No matter how big or small your wall is, laying it out on the floor lets you visualise the space and get a sense of what works.” Play around with combinations until you land on an arrangement that feels balanced and intentional.
Top Tip: Snap a quick photo of the final layout to use as your placement guide when hanging.

Credit: Instagram/amandaholden
2. Keep a Cohesive Theme… But Mix It Up
A cohesive gallery wall doesn’t mean every frame has to match perfectly. A variety of frame styles—black, white, wood, gold—can add visual interest, but the trick is to create consistency. Hoppen advises, “If you’re mixing frame styles, ensure it looks deliberate. A mismatched aesthetic only works when there’s balance.”
Choose one consistent element, like black frames with white mounts, and then experiment with shapes, sizes, and spacing. For a modern twist, a mix of asymmetrical and linear placements can work beautifully.
3. Use Paper Templates (and Avoid Holes in the Wrong Places)
To avoid the dreaded multiple holes in your wall, cut out paper templates of your frames and tape them to the wall where you plan to hang each piece. This lets you step back, tweak the arrangement, and perfect the spacing. Once you’re happy, mark where the nails or hooks should go directly on the template.
Pro Tip: For foolproof alignment, use a spirit level or laser level—a small investment for gallery wall perfection.
4. Measure Your Spacing
While gallery wall placements can embrace a relaxed vibe, spacing matters. Too much space between frames can make the arrangement feel sparse, while too little can make it cluttered. A good rule of thumb? Leave around 2-4 inches between each frame for a polished yet natural look.

5. Work From the Centre Out
Whether you’re creating a symmetrical photo gallery wall or a more relaxed style, start from the centre and work outward. Identify the wall’s focal point—the frame you want to draw the eye to—and position it at eye level. Build your arrangement from this anchor point, balancing smaller and larger frames as you go.
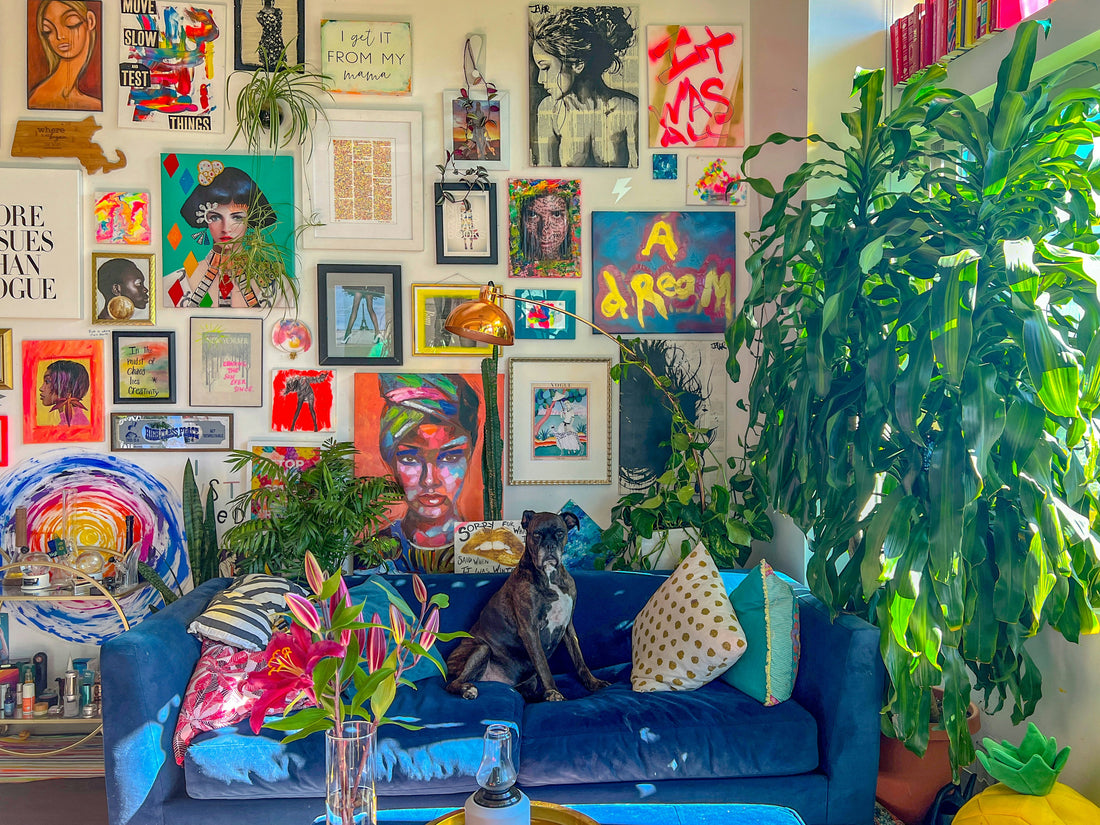
6. Consider the Entire Space
A stunning photo wall isn’t just about the art—it’s about how it interacts with the room as a whole. As designer Bobby Berk puts it, “You want the wall to feel like an intentional part of the space — not just something you threw up at the last minute.”
Paint your wall a soft neutral (think sage, taupe, or charcoal) to create contrast and let the art pop. Surround the gallery wall with clean-lined furniture and minimal accessories to ensure the space feels balanced and cohesive.
7. Trust Your Instincts
Finally, embrace your personal style and trust your instincts. A gallery wall should tell your story—whether that’s through cherished family photos, music prints, or vintage art finds. Hoppen encourages us to think about what the display means to us: “If I’m walking into a room, it’s important that what I see every day brings me joy.”

The Final Word
Creating a photo gallery wall doesn’t have to be intimidating. With careful planning—and a little creativity—you can transform any space into a showcase of personality and style. So, get those frames on the floor, test out those layouts, and make your walls sing!
Quick Checklist for Gallery Wall Success:
✅ Plan your layout on the floor
✅ Use paper templates to avoid wall damage
✅ Mix and match frames with intention
✅ Keep consistent spacing (2-4 inches)
✅ Start from the centre and work outward
✅ Style the wall to complement the room
Now, go forth and curate your perfect gallery wall! 🎨🏡